 Printwear & Promotion The Total Promotional Package
As digitisers, designers and all-round creative people, Wilcom knows that originality and quality are paramount when it comes to your designs.
If you’ve not already heard of it 3D foam, also known as 3D puff, is a technique which allows you to raise the surface of your designs, making them essentially three-dimensional. 3D foam can give your designs a complete creative boost, transforming them completely. However, some parts of the technique may be a little tricky so take a complete look at the complete guide to 3D foam that Wilcom has put together.
A little about 3D foam
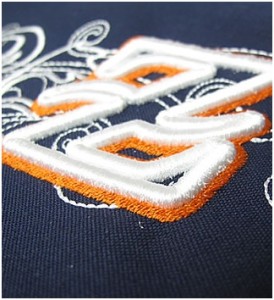
3D foam (3D puff) is a technique where foam is inserted under the top stitch to raise the surface, giving a three-dimensional look to your embroidery designs. The 3D foam effect is commonly used on garments that don’t require much washing. Apparel like caps, jackets and other outerwear are pieces that are best suited for this technique.
To better understand the whole concept Wilcom has created a quick video which can be viewed by visiting www.youtube.com/watch?v=15jOBhIG__I.
Wilcom understands that an important step to learning something new is seeing the actual product, which is why the company has provided a complimentary sample file for you to get a better idea of the 3D foam technique. This can be downloaded by visiting www.wilcom.com and search for 3D foam.
Things to be aware of when attempting to use 3D foam
- The type of foam used is very important: the best place to obtain it is through your accessory supplier as not all foams are suitable.
- Foam colour is also important: it is best to use the same colour as your top thread as any excess foam would be less visible.
- Subject matter is also important: 3D foam works best with satin stitching. If the object you want to raise can’t be digitised in satin, then you shouldn’t use foam.
Why is the 3D foam technique different?
The 3D foam technique is different to standard flat embroidery in the following ways:
- Capping: Where the top stitch is not covering the foam, a separate object is created to cap the corners usually running in a perpendicular direction.
- Securing stitches: These are needed to hold two objects together.
- Stitch density: Spacing between penetrations needs to be denser to help cut and cover the excess foam.
- Top thread tension: This is usually loose when stitching a foam design.
- Fonts and basic shapes are commonly used.
- More pull compensation is needed for the thickness of the foam.
For more information visit www.wilcom.com


