 Printwear & Promotion The Total Promotional Package
Like any specialised skill, machine embroidery comes with its own set of challenges that can frustrate even the most experienced embroiderer with puckering being one of the most common issues. Natalie Greetham, Madeira UK’s marketing manager, explains how you can fix this problem with ease.
Puckering can detract from the quality of the final product, leading to wasted materials, increased production time, and customer dissatisfaction.
Understanding the causes and solutions is crucial for anyone looking to achieve professional-quality results. In this article, we will delve into the reasons behind puckering and provide practical tips to overcome this obstacle.
Puckering
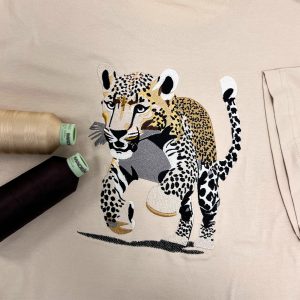
Puckering is when wrinkles and distortions appear in the fabric around a design affecting both the aesthetic quality and the durability of the embroidered item. It can be caused by several factors, often related to the fabric, stabiliser, threads, needles, or even the design itself.
Inadequate stabilisation
The correct stabiliser is crucial for keeping the fabric in place during stitching and using the wrong type of stabiliser for the fabric can cause issues.
For instance, using a tear-away stabiliser on stretchy fabrics such as knits or sportswear, which can move during stitching, is not recommended. If the stabiliser is too lightweight or not enough layers are used this can lead to puckering. Specialist backings such as Madeira’s cut-away Weblon offer the high stability needed for stretch fabrics and using a temporary adhesive spray can help to keep the backing in place.
Fabric tension
Select a hoop that is only slightly larger than the design and ensure the fabric is taut like a drum within the hoop. If the fabric is too loose it will move and distort. To achieve consistent fabric tension and save time, try using a magnetic frame.

Thread tension
Inconsistent tension settings between the upper thread and bobbin thread can lead to uneven stitching and puckering.
The amount of tension needed will differ depending on the thread type, in general, the thicker the thread the tighter the top tension should be. Machine speed will also have an effect, the faster the speed, the more precise the tension settings must be. While polyester threads are stronger this can sometimes lead to problems as it will stretch during stitching which may cause puckering once the design is removed from the hoop and the thread returns to its original shape. You’ll know the tension is perfect when you have 1/3 bobbin thread to 2/3 top thread visible underneath. More white bobbin thread visible on the back of the embroidery indicates the top tension is too tight.
It’s a good idea to run a tension test on your machine periodically as tensions can alter over time.

Needles
Using the wrong size or type of needle for the fabric and thread can cause puckering.
Check the recommended needle size for the weight of thread, a 75/11 needle is the standard size suitable for most applications with 40-weight thread. Choose smaller needles with finer thread and/ or lightweight fabrics and larger needles with thicker thread and/or heavier-weight fabrics.
- RG – Regular sharp point for tightly woven fabrics such as silk, reduce your needle size for finer fabrics to prevent holes forming around the design.
- FFG/SES – Light ball point for polo shirts, knits and fleece, the rounded tip is designed to part through the weave.
- SUK – Medium ballpoint for stretchy loose-knit fabrics.
- GEBEDUR – Titanium coated for tough fabrics, caps, leather and selected metallic threads, can last up to 5 times longer than average needles.
Design density
Designs with very dense stitching can cause puckering, especially if the fabric and stabiliser are not able to support the number of the stitches.
Let your digitiser know the fabric type so the density can be adjusted, reducing it by 10% will filter out any unnecessary stitches and improve the finished result. Use a stitch direction slightly diagonal to the fabric’s warp and weft to help keep the fabric flat during the embroidery process and start at the centre of the design, rather than from left to right, to protect the fabric and improve the results.
Customers expect high-quality, smooth embroidery and puckering can undermine your professional reputation. By understanding the causes and applying the right techniques, such as stabilising fabric properly, adjusting tension and selecting the appropriate needles and hooping methods you can significantly reduce the risk of puckering.


